

Friday, April 30, 2010
Thursday, April 29, 2010
A Little Urban Is On It's Way!

Click the Read More button to see what I found!

Tuesday, April 27, 2010
Playing With Color

Monday, April 26, 2010
Summer Two Pea Pasta

I made this pasta the other night for dinner. It was nice and fresh and something different, but I have to be honest it was not my all time favorite. If you want a fresh change though try it out and let me know what you think of it.
Sunday, April 25, 2010
Utah Home Remodeling Show
Friday night the husband took me out for a little date night. He knows just what I like to do and took me to a Utah Home Remodeling Show. It was a nice night out, but I wish the show had been better. It was mostly heating and air companies, roofing companies, and randomness. I wish there would have been designers, decor items and ideas, wallpaper, and fixtures etc, but to my disappointment there wasn't. I did run across a few things I loved though.


Thursday, April 22, 2010
Back in the Day Projects: Kitchen Remodel
I was tagged by another blog to share my 6th picture ever posted. Since I have not been doing this blog terribly long I decided to pull a picture from my family blog which ended up being perfect because it was a before picture of our old condos kitchen before we remodeled it.


Tuesday, April 20, 2010
Winning and Losing
Sometimes you win some, sometimes you lose some. Unfortunately this week I have lost more than I have won. Both my projects for the week did not turn out. First I wanted to make these...


Sunday, April 18, 2010
Garden? Check!

Well I got one big "To Do" off my list and I have the bad tan lines to prove it. We pretty much finished up everything with our garden area this last Saturday.
And the Winner is... / April Giveaway

Jessica is a fellow Salt Lake City mommy-blogger and a part-time photographer.
Friday, April 16, 2010
Utah Shopping "Flight" Map
With all the new changes to my blog I was not sure if you all noticed the new button I have added

This Utah Shopping Map includes all my favorite shopping destinations and secrets. I will continue adding to it and will update each location with photos and possibly even some video as I go visit them again. I tried to make the location descriptions as informative and interesting as possible so I encourage you to read them.
Let me know what you think of the map and if it was helpful for you. I love feed-back so I can make my blog better for YOU.
Hope you enjoy the new blog feature, and hopefully I will see you around town!
Thursday, April 15, 2010
"All is Safely Gathered In": Family Home Storage
I am so excited to announce that the Bird and the Berry will be partnering up with a local Utah company Shelf Reliance. We are still working out all the details, but are both excited. I can tell you that there will be awesome giveaways and a chance for everyone to save on their products in the future.
SHELF RELIANCE is a company that specializes in food storage, storage rotation, and emergency preparedness products. If you are Mormon or live in Utah those words are old hat, if you are not check this out to learn more about how you and your family can become self reliant. It is less about religion and more about being prepared.
With Shelf Reliance that task may have just gotten a lot easier for all of us. After months of planning, testing, and experimenting, Shelf Reliance has come up with the perfect answer. I introduce to you …
Wednesday, April 14, 2010
Kids Picnic Bench: Finished and Painted

I finally finished painting Jaynas picnic bench. My husband thought I was crazy to do two coats of paint, antiquing, glazing, staining, and two coats of top coat on an outdoor kids picnic bench, but I love how it turned out.

I am hoping this will be one of those items that Jayna will want to pass down to her kids someday. I built it well enough and treated it well enough that it could be. That is if I can part with it and the memories it will hold by then of her being a little girl playing in my backyard.
For Painting Technique How To Click the Read More Button Below...
Tuesday, April 13, 2010
Blog Makeover
the Bird and the Berry will be getting a blog makeover soon. I am excited about the changes, but nervous. I hope you all like the new design. I do everything myself and am by no means a pro, but really love dabbling and playing with it. I am hoping to change everything over by the end of this week. That is if the stars align and I find enough time to do it.
Here is a little sneak peek of what some of the blog elements will look like.

Let me know what you think?
Monday, April 12, 2010
Backyard Progress: Looking Like a Garden
This weekends weather finally gave us a chance to get working on the backyard again.
April Giveaway: Citristrip
Our first Giveaway starts NOW!
Brought to you by...

The winner of this Giveaway will receive a half gallon bottle of Citristrip Stripping Gel.

Which is a powerful, industrial-strength remover. It is easy to use because it stays wet and active for up to 24 hours, allowing stripping of multiple layers in one step. It contains no methylene chloride, is non-caustic and is safe for indoor use. This special orange stripper has a pleasant citrus scent and is also biodegradable. I have used it for many of my projects and have talked about it on the blog before. I am so excited for one lucky reader to be able to try it out! Citristrip products are available for purchase at both The Home Depot and Lowe's and can be purchased online at The Home Depot.
This Giveaway will end on April 17th at midnight mountain time.
Open to United States residence only.
How to Enter Giveaway:
1. Become a follower of the Bird and the Berry to obtain one entry for this Giveaway. If you are already a follower of this blog you will gain an entry as-well.
2. Visit the Citristrip website to learn more about their products and leave a comment on this post to obtain a second entry to this Giveaway.
The winner of this Giveaway will be announced on Monday April 19th.
Good luck!
Sunday, April 11, 2010
Upholstered Coffee Table
 Remember this coffee table from a jack pot trip to the thrift store I had? Well I finally got around to finishing it.
Thursday, April 8, 2010
Cowgirl Cookie Mix

I am busy working on making these wonderful cowgirl cookie mixes from Bakerella for my Bake Sale coming up next month. I am trying to make it easy on myself since I will be the only on baking for it. I thought these would make a great Mother Day treat too, since the Bake Sale will be right before Mothers Day. Now I just need to print her labels out and slap them on the jars and I am done. So fun and easy! See you tomorrow!
Tuesday, April 6, 2010
Homemade Sugaring Wax - Wax On Wax Off
 The other night, in-fact it was the same night we painted the laundry room, the husband brought up waxing. To spare the innocent I will leave out the details of the conversation, but it got me thinking about sugaring. I had had this done on my sensitive areas one time before, and it was sooooo much better than being waxed. I also just figured out that there is an esthetician at Blush salon studio and spa that I go to that does this sugaring method. Then I wondered if there was an easy way to make sugaring wax at home.
Fancy that there was!
After watching 5 million horrible you tube videos on how to make it I tried it out myself. It is not the easiest thing to make by a long shot. The ingredients are very simple and what most people already have in their kitchens, but it has to be cooked just right. Not too much and not to little, which can be tricky when that is only a minute or two difference. There are videos online that show people using the sugaring in an almost putty consistency, but I could not get mine to that state. I did have success with my second batch though and was able to use it like a hot wax, spreading it on and applying a strip of muslin fabric over it and then ripping it off the area. It worked great! I was really happy with it and was excited to have a cheap waxing option that I could do at home.
I only have my eye brows waxed about twice a year, and get the "every blue moon" bikini wax. This made me excited to wax more. Cost wise it has never been worth it for me to wax my legs, arms, or face. I would never think about trying grocery store waxes for the sole worry of bad reactions to cheap chemical mixes. This is all natural though, which means little to no chance of reaction. I remember when I got it done I had no irritation or break-out at all. Which I loved, I mean who wants to go exchange hair for a rash and pimples. No thanks!

So the recipe for sugaring wax is...
2 cups sugar (any sugar, I used white)
1/4 cup water
1/4 cup lemon juice (fresh squeezed or bottled)
Place and mix these ingredients in a sauce pan on the stove over a medium high temperature. The mixture will begin to bubble and boil a little (make sure not to over boil). After about 5 minutes the mixture will at some point begin to change color. When it looks a golden brown (almost like honey) you will want to remove from stove and pour into a clean container for storing (one that can be reheated). You can also get a spoon-full of the sugar water and run it under cold water to make sure it is sticky and will slightly ball up to see if it is done. Others said that a candy thermometer reading 260 will indicated a done sugaring wax (I did not have one). Let it cool for an hour or two. To heat it up just stick it in the microwave for about 30 seconds until it is a honey like consistency. Check how hot it is before applying to skin.
I loved the final working batch, but this can be frustrating to try and master. I think it is for-sure one of those things that you will love doing once you get it down though.
My poor husband and his brother had to be my ginny pigs for this wax in-between painting. It was a fun random night of crafts and projects though.
I will do a video on this as soon as I grow some leg hair out and get more sugar.
LOL!
Monday, April 5, 2010
Laundry Room Makeover - How to Paint Stripes

The weather here in Utah ruined my plans this last weekend for finishing my garden in the backyard, and getting family pictures taken. I was so disappointed, but was determined not to let the husbands three day Easter weekend go to waste. So I put him and his brother to work in the laundry room for a quick weekend room makeover.


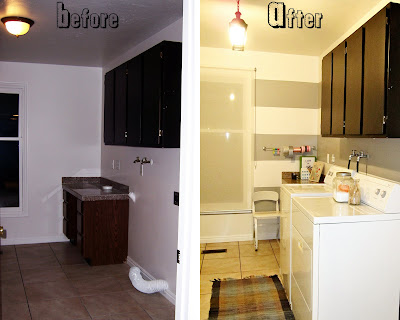


I have been using frog tape lately for various projects of mine that have require me to use paint blocking tape. I have really liked it, and have thought it has lived up to it's claims. I was checking out their website the other week and found this great picture of a striped hallway on their homepage.

I loved it! I have a favorite piece of fabric that is white and gray striped, and I am still waiting to find the perfect project to use it for. So I thought, what would be even better than my favorite fabric? Having a room in my house that makes me feel like I am living in my favorite fabric!

I had the husband replace the stock dome light with this black lantern style indoor/outdoor pendant light that I bought off of craigslist for $10.00. I have another one that I will put in the laundry room bathroom as-well. I wish they were a little bigger, but I think they look fun. I have to fix the paint on the ceiling though, because it looks like the previous owners (the bank) just painted around the dome light.

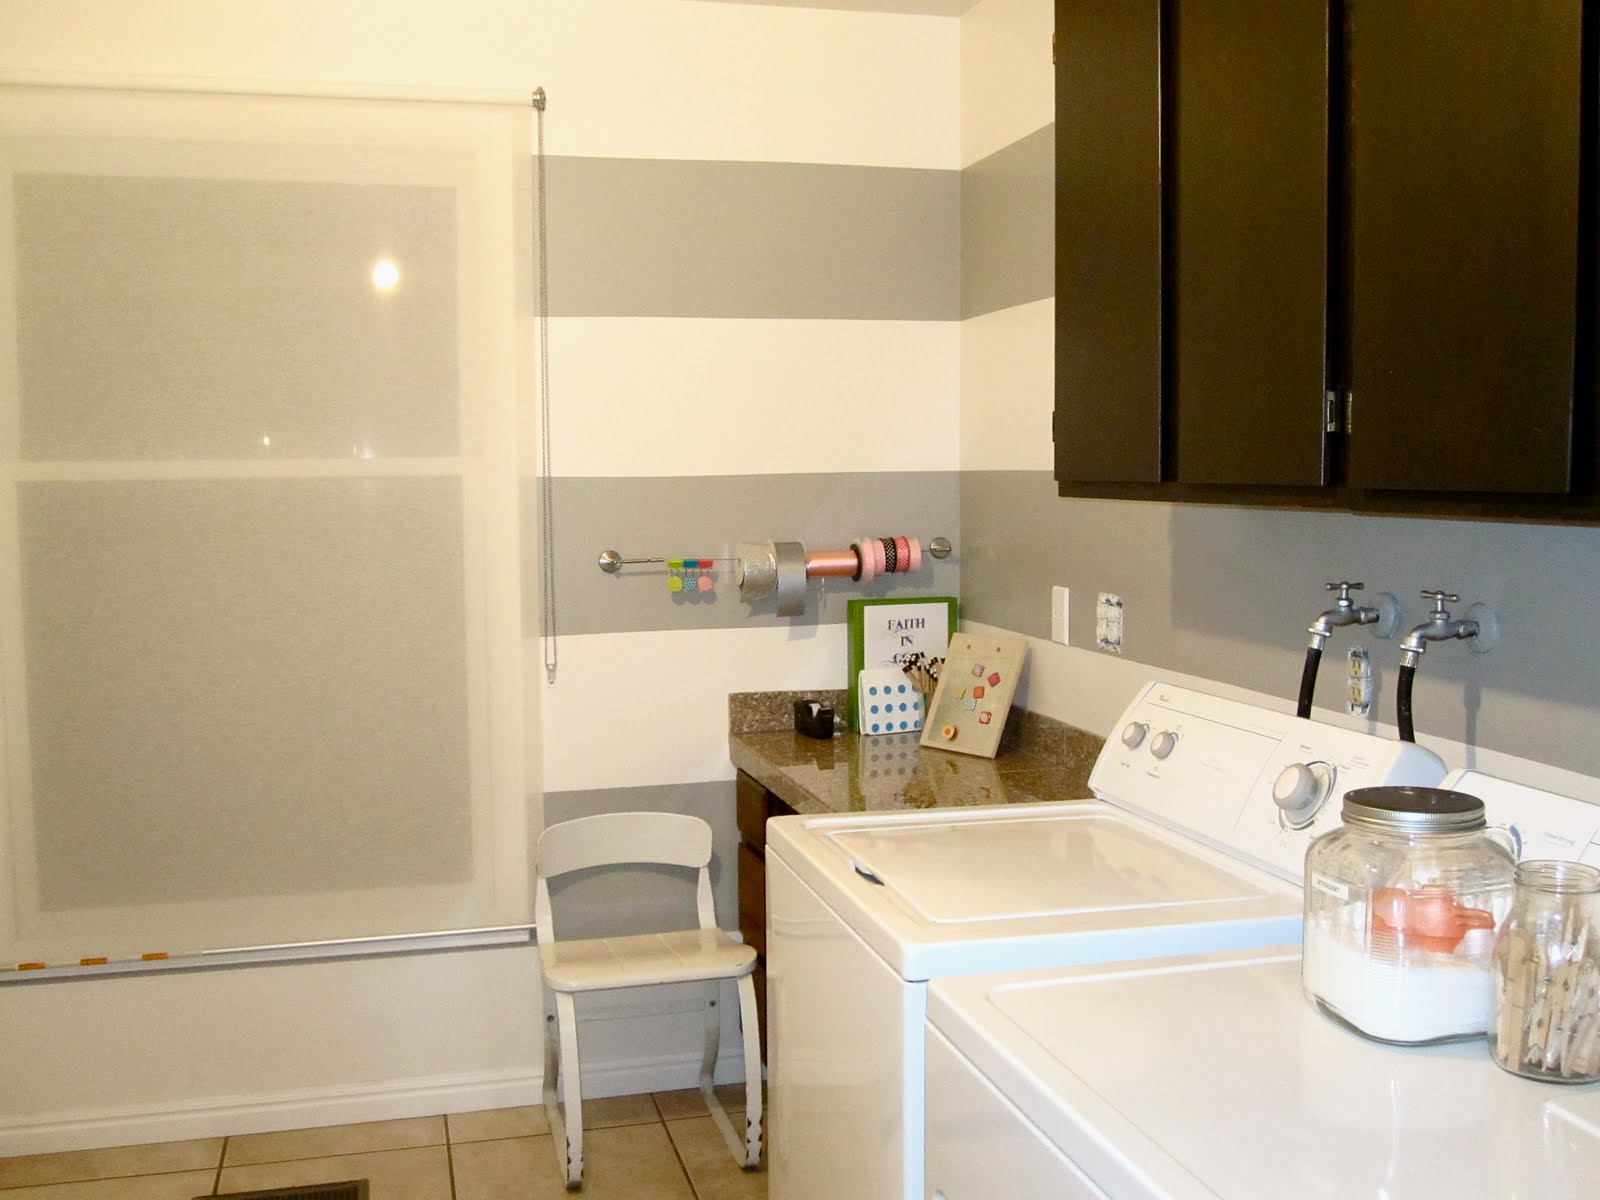
We then went to work marking off where our paint stripes would be. You want to first decide how big you want your stripes to be and then measure them out on the wall with a tape measure marking your stripes with a pencil mark on the wall about every foot or so. We wanted this project to be quick and easy, so we made sure that we would start and end with a white stripe so that we did not have to do as much cutting (painting against trim-work or ceiling with a brush).

After we were done marking everything we began to tape. When you tape the stripes off make sure you are placing the tape in the correct spot. Depending on what stripe you are painting your tape will either go above or below your marks. Check your tape once placed on the wall to make sure your tape is level. Not all walls are level and that could effect your marks and taping, so make sure to double check everything before painting. After we finished taping we ran the edge of a credit card over all the tape to make sure it was adhered well to the wall, and that there were no bubbles.

*opposite of what this picture is showing I would recommend to paint horizontally with the tape to assure you do not pull the tape up while painting*
Next step paint! I used the same color gray that I used on my kitchen table which was San Antonio Gray by Benjamin Moore (mixed in Behr paint from the Home Depot). We used rollers to paint the majority of the taped off sections. Make sure you paint the right section! I was really paranoid about this because I do not have the white paint for this room. So touching up and fixing mistakes was out of the question. Then we used our Purdy brushes to do the cutting in the corners and edges. Purdy brushes are a must for any good paint job, don't waste your money buying cheap brushes. The tricky part here is that you do not want the paint to dry too much because it could affect the tape and the sharpness of your line, but you still will probably need to do two coats of paint. We waited about 10 minutes or so before doing the second coat of paint, and cutting. So if you are doing a big area it would probably be best to work in little sections rather than rolling a first coat on the whole room. It will just leave you scrambling to get all the cutting done in-time for a second coat.

Then comes the fun part! peeling off the tape to reveal your freshly painted crisp stripes.

We removed the tape immediately after painting the second coat. You want to double check that all your tape edges are well painted. Remember you can always touch up the center of the stripes, but the edges where the tape is will be almost impossible to touch up afterwards. This was the biggest project I have used frog tape on and it really pulled through for me. I had almost no touch ups or bleeding to deal with. The little that I did have was quickly removed or fixed with a wet Q-tip since the paint was still fairly wet after removing the tape. It was critical to me that my tape work well, since like I stated before I did not have the white paint used in this room.
I love my "new" laundry room. It makes me so happy to go in there that I may actually do laundry. I am still trying to decide what color to paint the cabinets in there. White, gray, or blue are the choices. Let me know what you think I should paint them. Now all I have to do is a little accessorizing and I think I will have a pretty spiffy laundry room.


Sunday, April 4, 2010
Marbleized Easter Eggs
 This post is obviously late since easter is done and over with, but I thought I would share this fun egg marbleizing technique we used on Saturday. The results were fun, and the combinations of colors you could play with to come up with your very own unique easter eggs are endless.
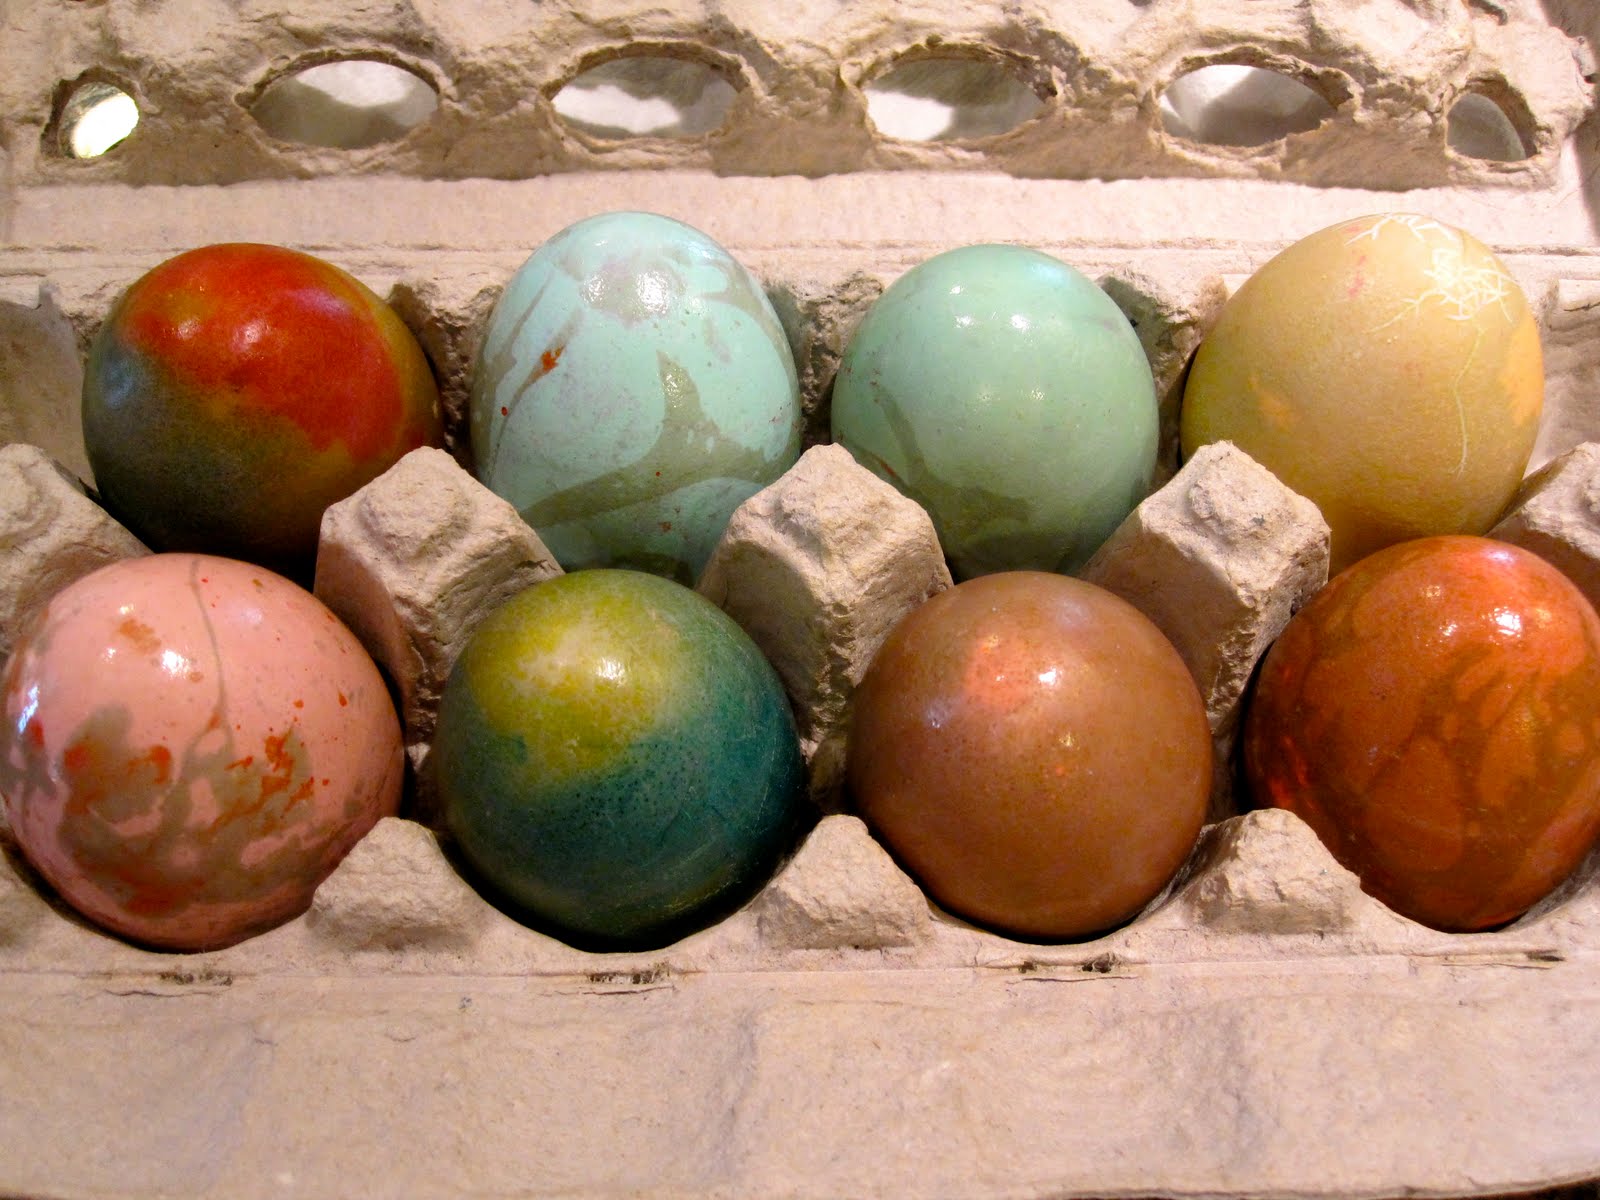
All you need to make these eggs is water... vinegar... food coloring... and olive oil.
Our dyes were slightly on the light side. I think our results would have been even better if they were a little stronger, especially the color you swirl the eggs in to marbleize them.
I even thought these eggs would make a cute craft or decoration for a little boys dinosaur party.

Subscribe to:
Posts (Atom)


12.15.09+no+background.gif)


